
Understanding Your Implant Dental Coverage Before You Book
Booking your implant appointment feels like the finish line. You picked a dentist, you are ready to fix the gap, and you just want to get it done. But implant dental coverage is one area where rushing the booking can cost you real money. Most surprise implant bills happen because patients assumed coverage that was never confirmed.
The good news is that you can verify everything before you commit. This guide gives you a five step verification workflow you can run over a week or two. It is the same basic process insurance coordinators use every day, broken down so you can do it yourself. Do this before you sign a treatment plan and you will walk into your appointment knowing exactly what you owe.
Quick answer: Verify your implant dental coverage before booking by pulling your plan documents, calling your insurer with your exact procedure codes, getting a written pre-treatment estimate, and confirming costs with the office billing coordinator. This check takes a few hours of effort and can save you thousands in surprise bills. Start at least two to four weeks before treatment.

Why Verification Comes Before Booking
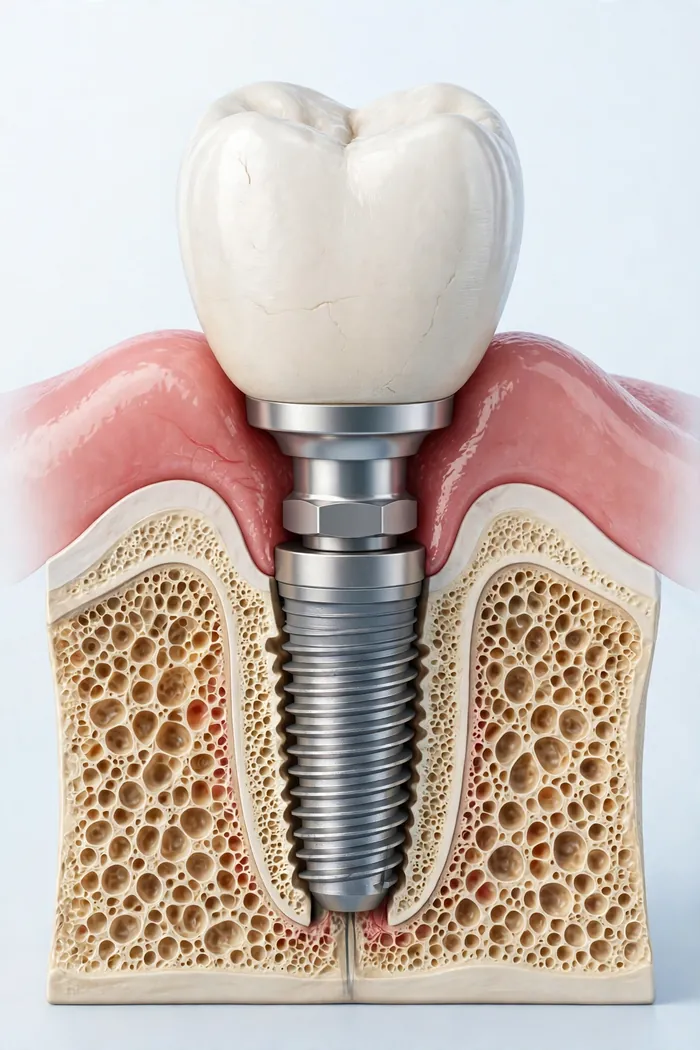
Implant treatment is not a single procedure. It is a sequence of separate procedures, and each one is judged by your plan on its own. The exam, imaging, extraction, bone graft, implant post, abutment, and crown can all carry different coverage levels. Your plan might pay well toward the crown but deny the implant post entirely.
This is why a verbal “yes, we take your insurance” tells you almost nothing. The front desk can confirm they accept your plan. Only a line by line verification shows what the plan will actually pay for your specific treatment. If you want to understand which plan parts pay for implants in general, read that guide first, then come back here for the hands on workflow.
Step 1: Pull Your Plan Documents and Find the Implant Language
Start with your own paperwork before anyone else gets involved. Your plan documents are the source of truth, and having them in front of you makes every later step faster.
Where to find your documents
Log in to your insurer’s member portal or app. Look for your Evidence of Coverage, Summary of Benefits, or benefit booklet. If you get insurance through work, your HR portal usually has the same files. Download the full document, not just the one page summary, because the exclusions section is where implant language hides.
What to look for
Search the document for “implant”, “major services”, and “exclusions”. You are looking for three things. First, does the plan list implants as a covered major service or as an exclusion. Second, what percentage does it pay for major services, typically 50 percent after your deductible. Third, your annual maximum, which in many plans sits between $1,000 and $2,000.
Pay attention to waiting periods too. Some plans require you to be enrolled for 6-12 months before major services are covered. If your coverage started recently, a waiting period can delay your booking even if implants are covered on paper.
Watch for alternate benefit clauses
Many plans include a clause that pays only for the least expensive alternative treatment. If your plan would cover a bridge at a lower cost, it may pay you the bridge amount and leave you to cover the difference for the implant. This is one of the most common sources of surprise shortfalls, so flag it early.
Step 2: Call Your Insurer With This Exact Script
Once you know what your documents say, call the number on the back of your insurance card. Have your plan documents open and a pen ready. Ask for a benefit verification specialist rather than a general representative if you get the option.
The questions to ask, word for word
Read these questions and write down the answers with the date, time, and the representative’s name or reference number:
- “Can you confirm my plan covers dental implant placement, and is there a waiting period before major services are covered?”
- “What percentage does my plan pay for major services after my deductible?”
- “What is my remaining annual maximum for this year?”
- “Does my plan have an alternate benefit clause that would pay a bridge amount instead of the implant amount?”
- “Is there a missing tooth clause that excludes teeth lost before my coverage started?”
- “Does my plan require a pre-treatment estimate or pre-authorization before implant surgery?”
- “Can you email me a summary of these answers?”
That last question matters more than it sounds. A written summary protects you if a claim is later denied. If the representative will not email a summary, note their name and the call reference number.
Missing tooth clauses deserve a warning
A missing tooth clause excludes coverage for teeth that were lost or extracted before your current plan started. If you lost the tooth years ago and switched plans since, this clause can wipe out your coverage entirely. Ask about it directly, because it is rarely mentioned unless you do.
Step 3: Get a Pre-Treatment Estimate in Writing
A pre-treatment estimate, sometimes called a predetermination of benefits, is a written statement from your insurer saying what they expect to pay for your specific treatment plan. It is the single most valuable document in this whole process.
How it works
Your dentist’s office submits the proposed treatment plan, with procedure codes and fees, to your insurer. The insurer reviews it and sends back an estimate of your coverage and your out of pocket cost. This is not a guarantee of payment, but it is close. Denials after a clean predetermination are much less common.
Processing usually takes two to four weeks, so this step is why you start early. Ask your dental office to submit it, and ask the insurer for a copy directly as well. Some insurers let members submit the request themselves through the portal.
What to check on the estimate
Read the estimate line by line against the treatment plan. Confirm every procedure code appears, confirm the covered percentage matches what the phone representative told you, and confirm the annual maximum math. If numbers differ between the phone call and the written estimate, the written estimate controls. Call the insurer to resolve the difference before you book.
Keep in mind that estimates expire. Many are valid for 6-12 months. If your treatment timeline stretches past that window, you may need a fresh one.
Step 4: Confirm Details With the Billing Coordinator
Your dental office has a billing coordinator or treatment coordinator whose job is exactly this. After you have your pre-treatment estimate, schedule a short call or visit to walk through it together.
Bring these documents to the meeting
- Your written pre-treatment estimate from the insurer
- Your notes from the phone call with the representative’s name and date
- The itemized treatment plan from the dentist
- Any medical insurance information, in case part of the surgery qualifies under your health plan
Questions for the coordinator
Ask which parts of the treatment are billed to dental versus medical insurance. Oral surgery connected to an accident or a medical condition sometimes falls under your health plan. Ask whether the office is in network for your plan, and whether any part of the treatment would be done by an out of network specialist. Ask about payment timing: do you pay your share up front, per visit, or after insurance pays. If you want to see how coverage math works on a typical case, that breakdown pairs well with this conversation.
Get the financial agreement in writing
Before you book, the office should give you a written financial agreement that states your estimated out of pocket cost after insurance. Make sure the number matches your pre-treatment estimate. If the office cannot produce one, that is a signal to slow down, not to skip the step.
Step 5: Know Your Backup Plan if Coverage Falls Short
Even careful verification can reveal that coverage is thin. Implants can cost $3,000-$6,000 per tooth, and a $1,500 annual maximum leaves a real gap. Planning for the gap is part of verification, not an afterthought.
Common backup options
- Phased treatment across plan years. If you need more than one implant, doing one per plan year can double the annual maximum you collect.
- Medical insurance crossover. Accidents, tumors, or congenital conditions can move part of the case onto your health plan. Ask the billing coordinator to evaluate this.
- HSA or FSA funds. Implant costs are qualified medical expenses. Using pre tax dollars effectively discounts your share.
- In house payment plans. Many implant practices offer interest free plans for 6-12 months. Ask before you assume financing is the only path.
- Third party financing. Medical credit cards and lenders exist for exactly this gap. Compare interest terms carefully, because deferred interest plans can turn expensive if the balance is not cleared in time.
If you are shopping for stronger coverage for future treatment, our guide to plans that cover implants walks through what to look for before you enroll.
Red Flags Hidden in the Fine Print
These are the clauses and situations that catch patients off guard. Check every one of them against your own plan.
Red flag 1: The implant post is excluded but the crown is covered
Some plans pay for everything around the implant but exclude the implant fixture itself. Since the fixture is often the most expensive single piece, this can look like generous coverage on paper while leaving the biggest bill on you.
Red flag 2: Frequency limits
Plans sometimes limit how often they pay for a crown or implant per tooth, such as once every five or ten years. If you are replacing an older implant or a failed crown, a frequency limit can deny the claim.
Red flag 3: The office is out of network and nobody said so
“We accept your insurance” does not always mean “we are in network with your plan.” Out of network offices can bill higher fees, and your plan pays based on its own fee schedule. Confirm network status with your insurer, not just with the office.
Red flag 4: The estimate assumed a different plan year
Annual maximums reset on a calendar or plan year. If your treatment spans the reset, coverage can split across two maximums, which is sometimes good and sometimes bad. Confirm which plan year the estimate was calculated against.
Red flag 5: Coordination of benefits confusion
If you have two dental plans, through your own job and a spouse’s, coordination of benefits rules decide who pays first. Without a clear primary and secondary designation, claims can stall or pay less than expected. Ask both insurers which is primary before treatment starts.
Your Pre-Booking Checklist
Print this out or save it on your phone. Every box should be checked before you sign anything.
| Check | Done |
|---|---|
| Plan documents downloaded, implant language located | |
| Insurer called with the question script, answers written down | |
| Waiting period and missing tooth clause confirmed | |
| Pre-treatment estimate received in writing | |
| Estimate math matches the phone answers | |
| Billing coordinator walked through the estimate with you | |
| Network status confirmed with the insurer | |
| Written financial agreement from the office in hand | |
| Backup plan in place for the gap |
Frequently Asked Questions
How long does implant coverage verification take?
The phone call and document review take a few hours. The pre-treatment estimate usually takes two to four weeks to come back. Start the process at least a month before you want to begin treatment so nothing feels rushed.
Can I verify implant dental coverage without calling my insurer?
Your member portal may show benefit summaries, but portals rarely show exclusions, waiting periods, or alternate benefit clauses. A phone call is still the most reliable way to confirm the details that decide your bill.
Is a pre-treatment estimate the same as pre-authorization?
No. A pre-treatment estimate is an advisory statement of expected coverage. Pre-authorization is a formal approval that some plans require before surgery. Ask your insurer whether your plan requires pre-authorization, because skipping a required one can mean a denied claim.
What if my dentist is out of network?
Out of network does not mean no coverage. Your plan still pays its percentage, but usually against a lower fee schedule, so your share grows. Get the estimate calculated for out of network benefits so you see the real number, and factor it into your choice of provider. A skilled provider matters for implants, so compare the best implant dentist near you options before deciding on cost alone.
Can I appeal if my implant claim is denied?
Yes. Most denials can be appealed, especially with a letter of medical necessity from your dentist and your pre-treatment estimate as supporting evidence. File the appeal in writing within the plan’s deadline, which is usually 60-180 days from the denial.
Should I delay treatment to get better coverage next plan year?
Sometimes waiting helps, such as when a waiting period is about to end or a fresh annual maximum is about to reset. But delaying a needed implant can lead to bone loss that makes the case more complex and more expensive. Discuss timing with your dentist alongside the insurance math.
Bottom Line
Verifying your implant dental coverage is not paperwork for its own sake. It is how you turn a vague “we take your insurance” into a written number you can plan around. The five steps in this guide take a few hours of your time plus a two to four week wait for the estimate, and they remove almost all of the financial guesswork from implant treatment.
Start today by pulling your plan documents and making the phone call. Everything else flows from those two steps. Book your appointment with confidence once the numbers are confirmed, not before.
This article is for informational purposes only and is not medical advice. Coverage rules vary by plan and state, and a pre-treatment estimate is not a guarantee of payment. Talk with your dentist and your insurer about your specific situation before making treatment decisions.
About Rankex Solutions
Rankex Solutions works on local SEO and Google Business Profile optimization for businesses in the UAE and the US. Its background is in rank-and-rent SEO and freelance search marketing.